

 Bahasa Indonesia
 Deutsch
 Español
 Français
 Português (Brasil)
 Türkçe
 ไทย
 中文(简体)
 中文(繁體)
 日本語
 한국어
Build your robot
In this tutorial you build the starter robot with the Robot Customizer. It is the robot used in all the examples of this documentation, so by the end you will have everything ready to program it.
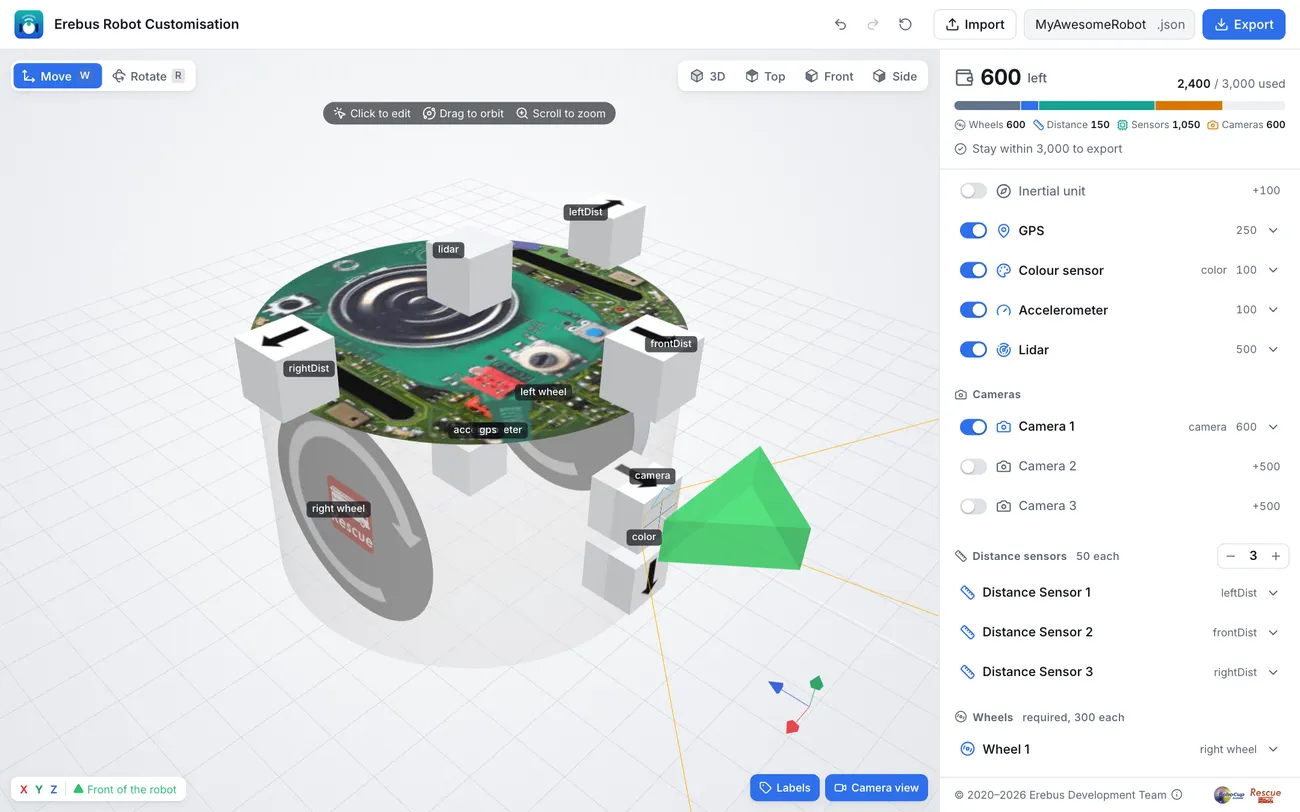
It costs 2400 of the budget of 3000.
Design the robot
Section titled “Design the robot”Open the Robot Customizer. It starts with the default parts: two wheels and four distance sensors. If you have used it before, press the reset button at the top to start again.
The positions are in tenths of a millimetre, although the boxes say mm: the body of the robot has a radius of about 370.
-
Set up the distance sensors. Under Distance sensors, press
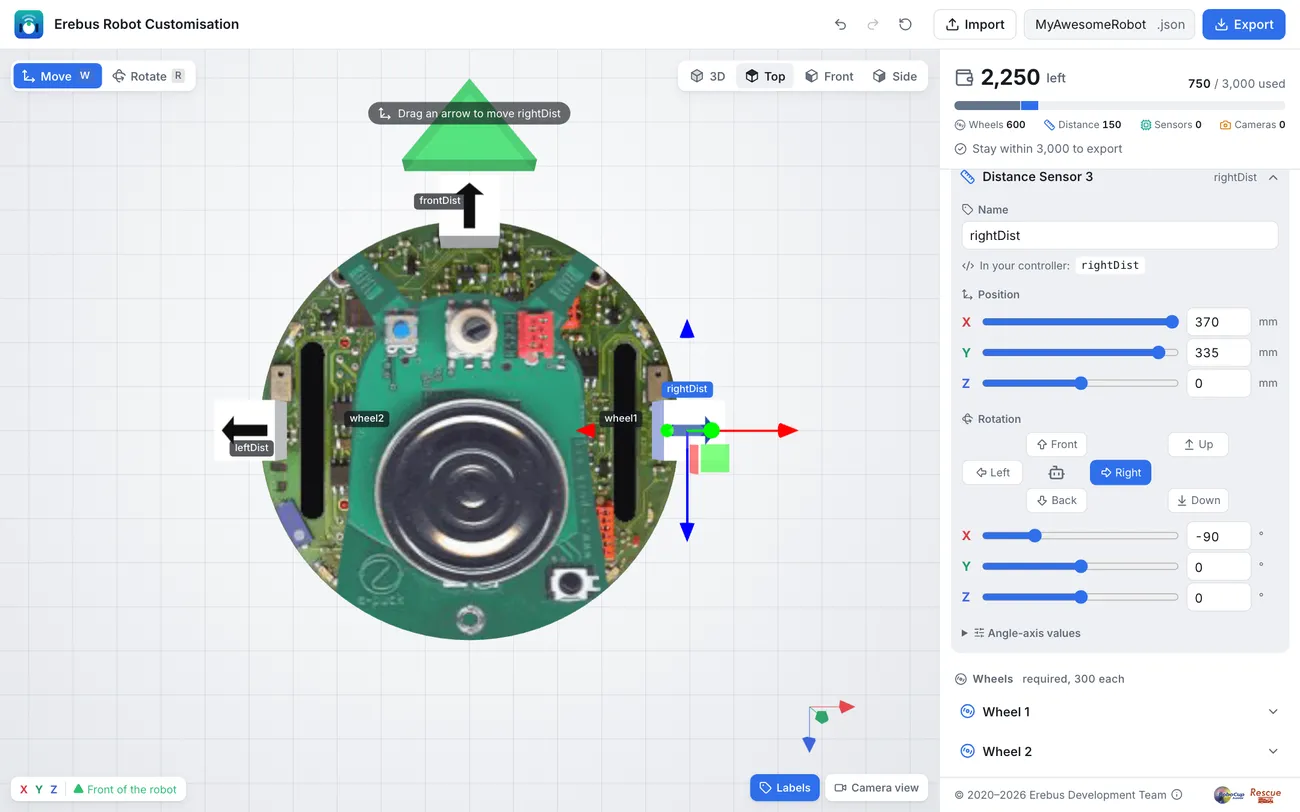
−once to keep three. Then click each one to open it, and set its name, position and rotation:Sensor Name X Y Z Rotation Distance Sensor 1 leftDist-370 335 0 Left Distance Sensor 2 frontDist0 335 -370 Front Distance Sensor 3 rightDist370 335 0 Right Type the values in the boxes next to the sliders, and press the rotation buttons. Top shows the robot from above, with the front up, so you can check that each sensor faces the right way:
-
Name the wheels. Open Wheel 1, which is on the right side of the robot, and name it
right wheel. Name Wheel 2left wheel. Your program will use them asright wheel motorandleft wheel motor, as shown under In your controller. -
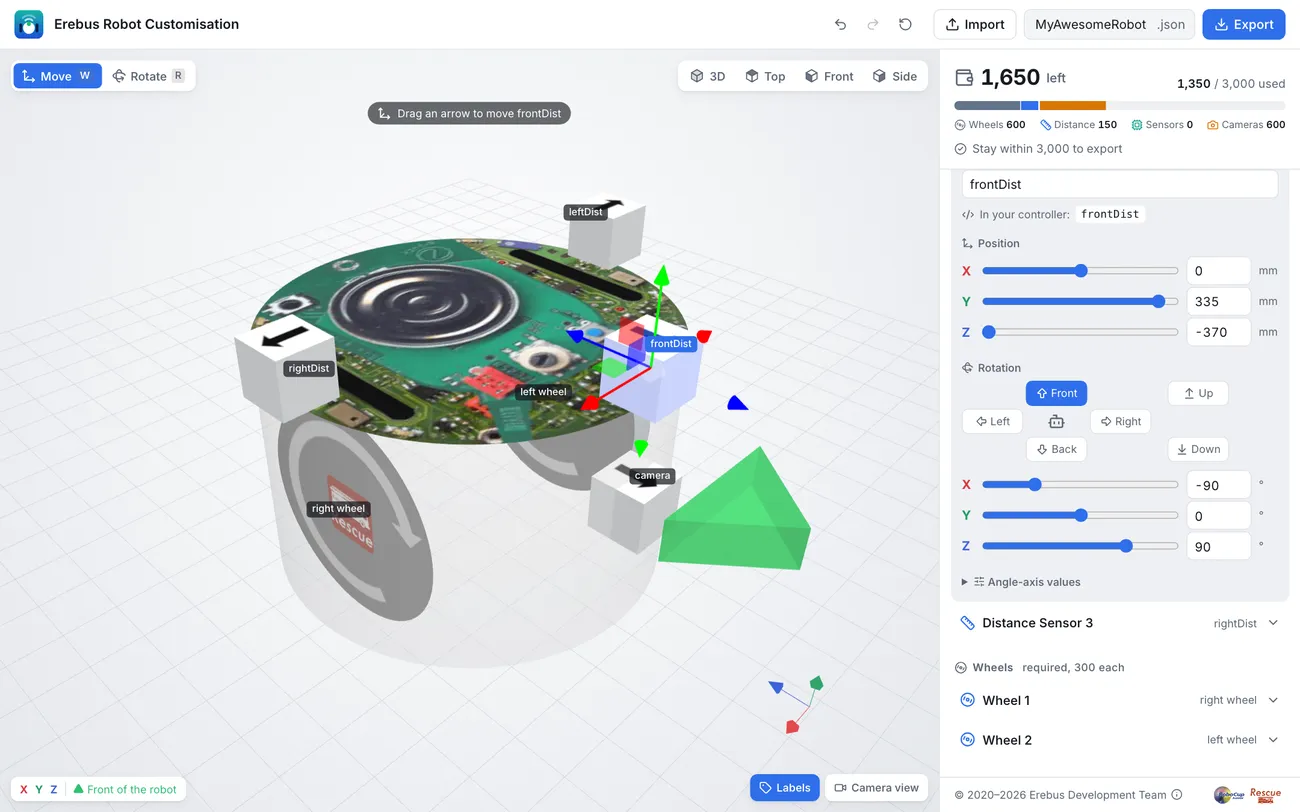
Add the camera. Turn on Camera 1, and set:
- Name:
camera - Resolution: width 64px, height 40px
- Position: X
0, Y90, Z-370 - Rotation: Front
- Name:
-
Add the colour sensor. Turn on Colour sensor, and set:
- Name:
color - Position: X
0, Y-41, Z-370 - Rotation: Down
The colour sensor must look down to see the floor. Placing it at the front lets the robot see a hole before its wheels reach it.
- Name:
-
Add the GPS, gyro and accelerometer. Turn on GPS, Gyro and Accelerometer. Their default names,
gps,gyroandaccelerometer, and their positions are fine. -
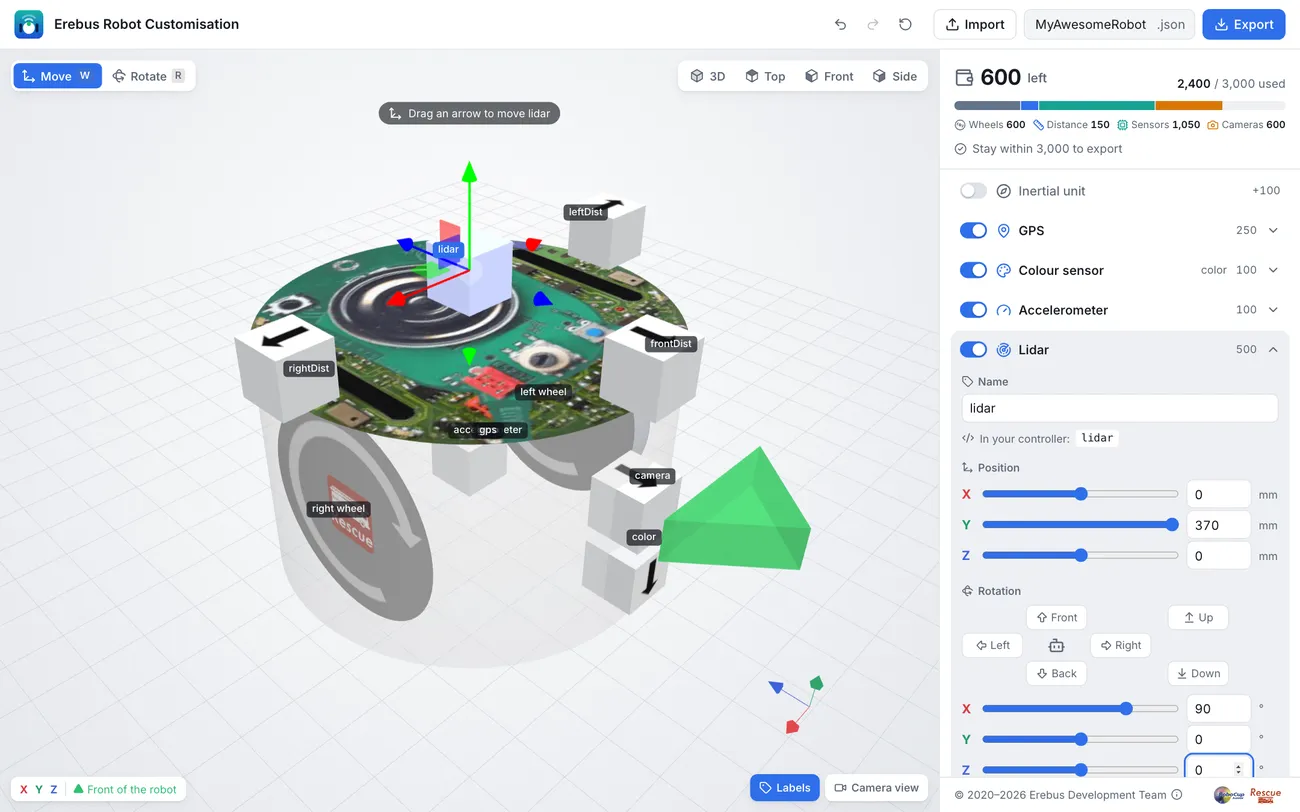
Add the lidar. Turn on Lidar, and set:
- Position: X
0, Y370, Z0 - Rotation: type X
90, Y0, Z0
The lidar must be on top of the robot, or the body blocks it, and it must lie flat to scan all around. The rotation buttons cannot lay it flat, so type the values.
- Position: X
-
Check the robot. The budget at the top right should show 2,400 / 3,000 used. Turn on Labels to see every name, and Camera view to see what the camera will see.
-
Export it. Type
starter-robotas the file name at the top, and press Export. Keep thestarter-robot.jsonfile: you can Import it later to change the robot.
If something went wrong, compare with the finished robot: download starter-robot.json and import it.

Erebus is part of RoboCupJunior Rescue.
News, events and team documents: RCJ Rescue Community Website
© 2020–2026 Erebus Development Team