

 Bahasa Indonesia
 Deutsch
 Español
 Français
 Português (Brasil)
 Türkçe
 ไทย
 中文(简体)
 中文(繁體)
 日本語
 한국어
Robot Customizer reference
The Robot Customizer lets you choose the sensors of your robot and where to place them. It runs in your browser, and exports a .json file that Erebus loads.
New to it? Start with Build your robot, which builds the starter robot step by step. This page describes everything else.
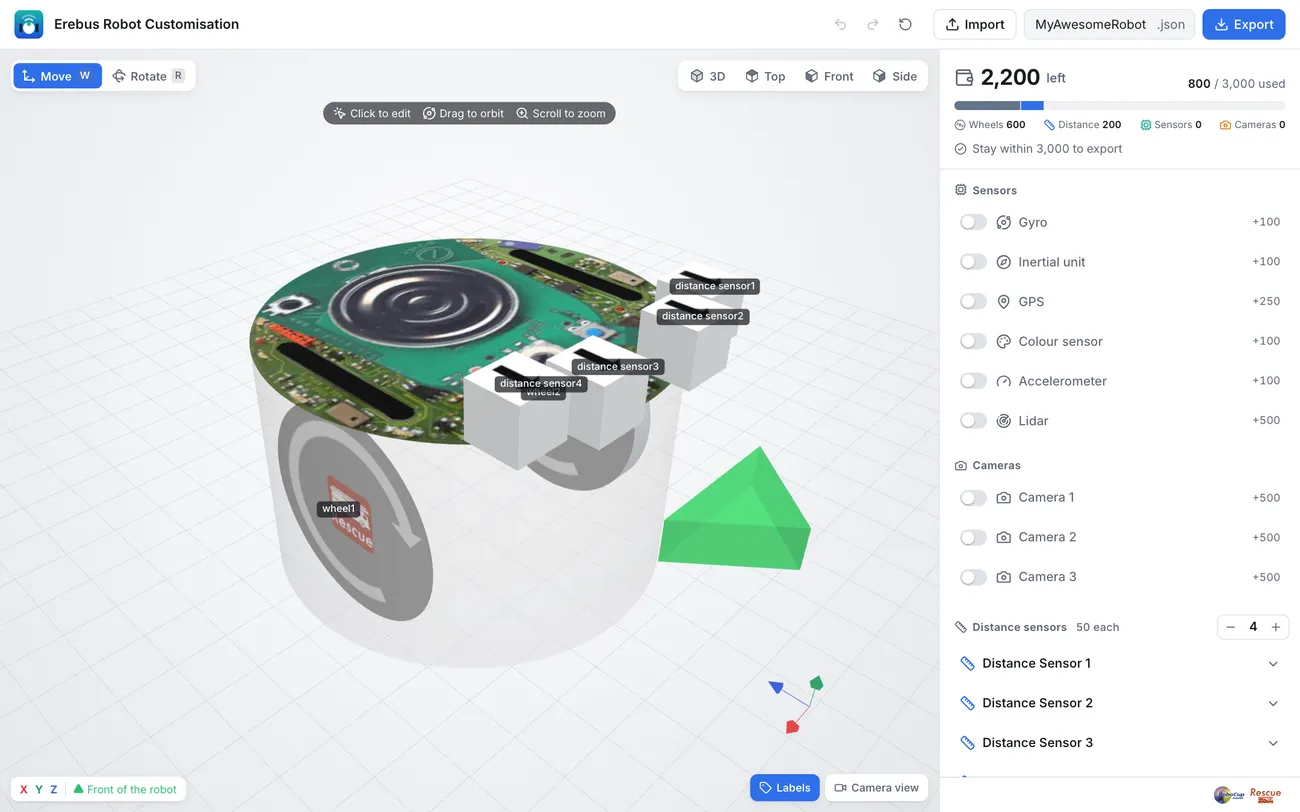
The 3D preview is on the left, and the components and the budget are on the right.
The screen
Section titled “The screen”- Add components. Turn on the switch of each sensor or camera you want, and set the number of distance sensors with
−and+. The cost of each component is shown next to it. - Keep within the budget. The top right shows how much of the budget of 3000 is left, and how it is split between wheels, distance sensors, sensors and cameras. If you go over, it tells you how much to remove: the robot cannot be exported until it fits.
- Place them. Click a component in the list or in the 3D view to open its settings. Drag the arrows in the 3D view, with Move (
W) or Rotate (R), or type the values. The positions are in tenths of a millimetre, although the boxes say mm. The Y position goes from -100 to 370. The rotation buttons point a sensor to the front, back, left, right, up or down in one click. The green arrow marks the front of the robot. - Name them. The name is what your program uses with
getDevice(), as shown under In your controller. Wheels get two devices:<name> motorand<name> sensor. Wheel 1 is on the right side of the robot, and Wheel 2 on the left. - Set the camera resolution. Each camera has a width and a height, which change its cost.
- Export it. Enter a file name at the top and press Export. Keep the file: Import, or dropping the file on the page, brings it back to continue working on it.
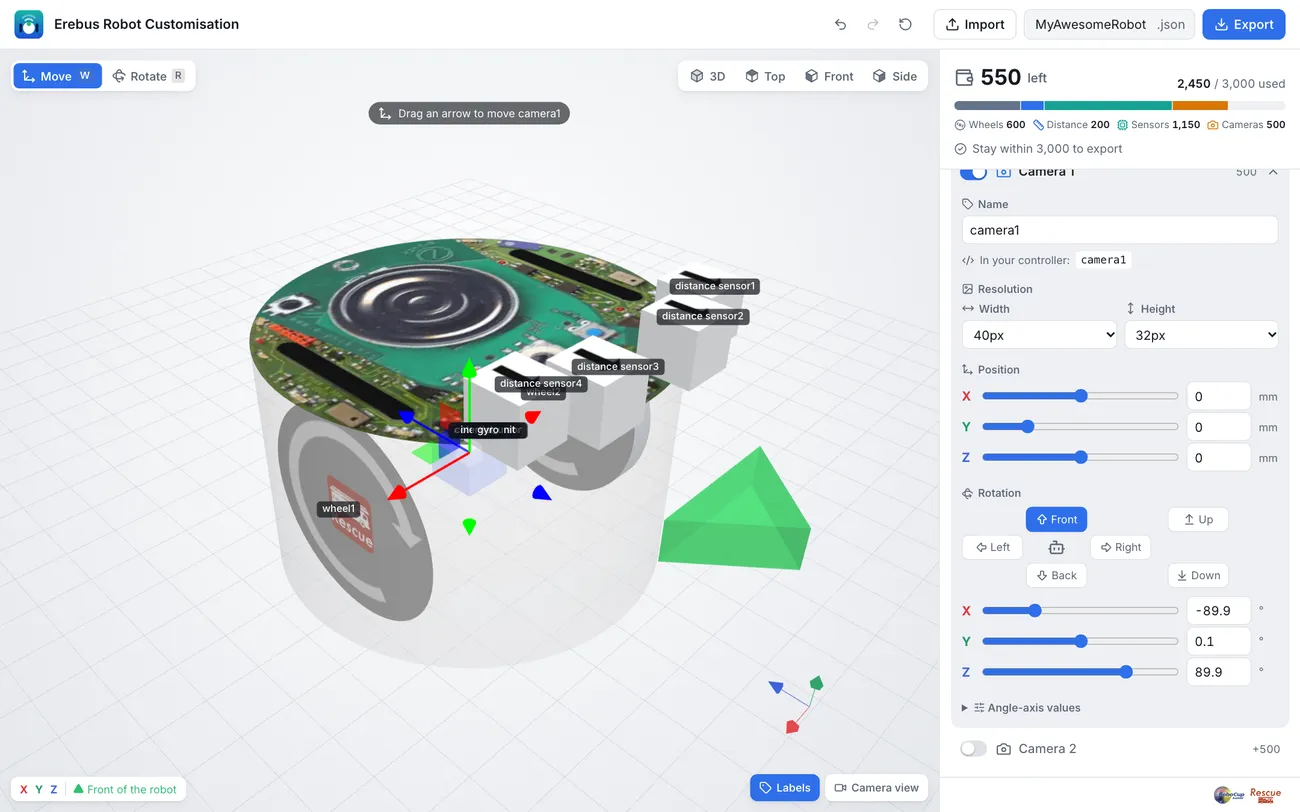
Useful views
Section titled “Useful views”- 3D, Top, Front and Side show the robot from different angles. Top is handy to place sensors symmetrically.
- Labels shows the name of each component.
- Camera view shows an estimate of what the cameras see in Webots.
- Undo, redo and reset are at the top.
Using it in Erebus
Section titled “Using it in Erebus”Press the right LOAD button of the control window and choose your .json file. See Load it in Erebus. Erebus checks the budget and generates the robot, and the Webots console lists each component and its cost.
Load your robot first, then your program.
Components
Section titled “Components”| Component | Cost | Default name |
|---|---|---|
| Wheel (2, required) | 300 each | wheel1, wheel2 |
| Distance sensor (up to 8) | 50 each | distance sensor1, distance sensor2… |
| Gyro | 100 | gyro |
| Inertial unit | 100 | inertial_unit |
| Accelerometer | 100 | accelerometer |
| Colour sensor | 100 | colour_sensor |
| GPS | 250 | gps |
| Lidar | 500 | lidar |
| Camera (up to 3) | 500, plus the resolution cost | camera1, camera2, camera3 |
The resolution cost of a camera is added for its width and for its height: 32 or 40 pixels cost 0, 64 pixels cost 100, 128 pixels cost 200 and 256 pixels cost 300. For example, a 256 × 128 camera costs 500 + 300 + 200 = 1000.
New cameras are 40 × 32 pixels. The starter robot uses 64 × 40.
The two wheels cost 600 together, so 2400 of the budget is left for everything else.
Design tips
Section titled “Design tips”- GPS: you need a position to report tokens, and this is the simple way to get it.
- Cameras: higher resolutions read tokens from further away, but they cost more and are slower to process.
- Lidar: it sees all around the robot, which helps a lot for mapping. Place it on top, and lay it flat with rotation X
90, as in the starter robot, or the robot blocks it. - Colour sensor: place it in front of the wheels, so that the robot sees a hole before falling into it.
Build your robot shows a complete example.

Erebus is part of RoboCupJunior Rescue.
News, events and team documents: RCJ Rescue Community Website
© 2020–2026 Erebus Development Team